Twine Reflection
What storytelling techniques have you used instinctively and which ones require more work for you? Which techniques will you focus on moving forward?
It Depends on the background and the type of tale, using storytelling skills might come naturally or need more conscious effort. Certain strategies are instinctual to apply, such drawing the audience into the narrative, building tension, and sharing a personal tale. Since these methods are essential to human communication and experience sharing, they frequently come easily to people. Still, other methods could take more effort. For example, it requires practice to become proficient in storytelling and to understand how to turn experiences into a tale. Developing skills over time, such as by studying seasoned communicators, putting oneself in their shoes, and utilizing tales in daily situations, are common ways to become an expert storyteller.In the future, the emphasis could be on methods that advance a narrative. These include employing visual design, metaphors, and analogies, combining emotion, and providing engaging data with a clear structure. Pages with a pyramid structure are also recommended. Furthermore, it might be helpful to comprehend and apply many story arcs, such as the Four C’s (Context, Conflict, Climax, Closure). These methods can raise interest and build anticipation, which improves tale recall and comprehension.
What learning experience does a branched narrative like Twine provide for learners? Where else do you come across branched narratives?
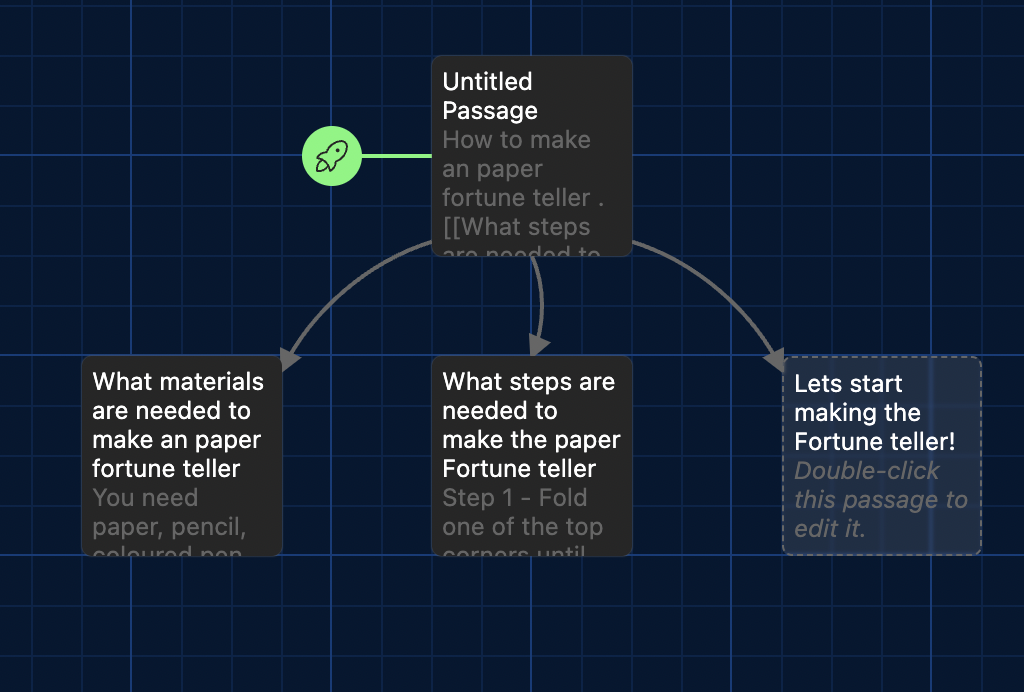
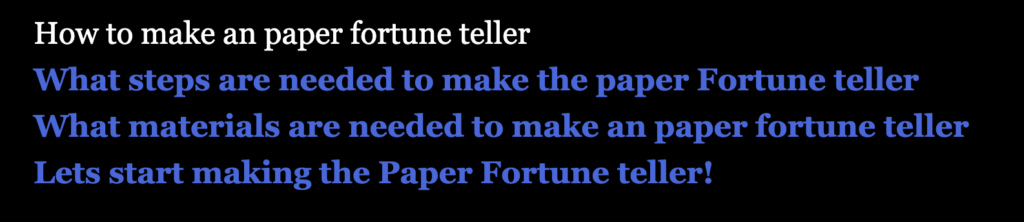
An engaging and dynamic learning environment is offered by a branching story such as Twine. Making decisions in the branching story gives students a sense of agency over their learning process and boosts their engagement with the course material. With several choices that have different consequences, this format forces students to exercise their critical thinking and decision-making abilities. They must consider the alternatives that are offered to them in order to analyse the decisions and try to determine which would result in the best conclusion. Additionally, it gives kids a playful setting in which they may practise growing from errors and trying different approaches when something doesn’t work the first time.Twine is not the only author of branched tales. They are available in a variety of formats, such as “Choose Your Own Adventure” novels, in which the reader’s choices take them to other sections of the book. Video games with a plot that changes depending on player choices are another well-known example. Branching scenarios are a common tool used by eLearning course designers to build dynamic and captivating learning environments.
Storyboard
| Narration: Hello, this is how to make a paper fortune teller |  |
| Narration: You need paper, scissors, coloured pens, and pencils |  |
| Narration:Fold one of the top corners until the top edge of the paper is exactly in line with the side opposite of the corner that you started at. Cut a straight line parallel with the bottom of the page along the line where the folded portion of paper and the small rectangle meet. |  |
| Narration:Fold the top right corner into the bottom left corner to create a triangle shape. Crease the edge then unfold it back out. Repeat with the other side. You should have an “X” shape with the folds. |  |
| Narration: Bring each corner to the center of the paper and crease the fold. Now you should have a mini square with all corners meeting in the middle. Flip the smaller square piece of paper over. |  |
| Narration: Fold each corner to the center once more. You will again have a square shape. The numbers should be facing towards you! |  |
| Narration: Fold the fortune teller in half so the numbers face in and the square flaps are on the outside. Slide your thumbs and pointer fingers under the squares to operate the fortune teller. |  |
| Narration: Here you go you have built a paper fortune teller |  |
Script
Introduction
Hello everyone today we will be making a paper fortune teller. These are the stuff we need first is paper then scissors then coloured pens and a pencil
The steps
Step 1 : Fold the top corner into the bottom left corner once you have created a triangle I will be cutting off the unnecessary part. once the unnecessary part is cut off we are going to repeat on the other side. Now you should have a triangle shape.
Step 2: Fold the paper in half then unfold again to the original square . Rotate it 90 degrees and fold it once more. When you open it up there should be 4 intersecting lines on the paper.
Step 3: Bring each corner to the centre and crease the fold. You should now have a mini square with the corner meeting in the middle. Flip the smaller piece of paper over and fold each corner to the centre once more.
Step 4: Writing the numbers outside the smaller folded paper.
Step 5: Fold the fortune teller in half so the numbers face in and the square flats are on the outside. Once you have created a triangle you want to unfold it.
Step 6: We start colouring in outside of the folds. The last part is sliding your thumb and pointer finger under the square to operate the fortune teller .This might be challenging since the paper is stiff but once you got it its going to be easier
Conclusion
This is how you make a paper fortune teller. Thank You!
Assignment Reflection
What is the learning purpose of your video?
The purpose of the video is to guide audiences on how to make a paper fortune teller.This video includes instructions in detail, making it easy for everyone to get started.
Why is video a good medium for this learning purpose?
The visual and interactive aspects of creating a video instruction for making a paper fortune teller make it a great learning tool. When learning anything hands-on, like making a paper fortune teller, watching videos of the procedure in action may be quite helpful. To make sure students grasp every step, they may fast-forward, rewind, or rewatch sections of the movie. Videos may also emphasize fine features that could be overlooked in textual instructions by using close-ups and various camera angles. Verbal explanations that go along with the visual example can also be helpful for auditory learners. Because it can accommodate different learning methods, a video instruction is a useful teaching tool for creating paper fortune tellers.
Which of the principles we’ve covered this term (e.g., Mayer/Universal Design for Learning/Cognitive Load Theory) did you incorporate into your design and why?
Mayer’s Multimedia Learning Theory: Learning occurs more effectively when words and images are combined. The steps are demonstrated visually in the video, and they are also explained verbally to improve comprehension.
Universal Design For Learning (UDL): Throughout my video, I’ve presented material in a variety of ways to accommodate varying learning styles. discussing it, much like the visual portion. It is also interactive because it allows viewers to pause and replay the spoken portion.
Cognitive Load Theory: limiting the quantity of material offered to prevent the student from being overwhelmed. The video reduces the inherent cognitive strain by segmenting the procedure into small phases and displaying each one separately.
What was challenging about capturing your own video?
Capturing my own video was a challenging endeavor. One of the first obstacles I encountered was ensuring adequate lighting and sound quality. Without professional equipment, it was difficult to achieve a clear and well-lit video, and the audio was not always as crisp as I would have liked. Framing the shot was another hurdle. It was tricky to position the camera in a way that captured all the necessary details, especially when demonstrating intricate tasks. I found myself constantly adjusting the camera angle for the best view. Delivering clear and concise instructions while performing the task was also a challenge. I had to be mindful of my wording and pace, which often required multiple takes. Lastly, I faced technical issues such as running out of storage space and battery life, which interrupted the recording process. Despite these challenges, the experience was a valuable learning opportunity.
What did you find easiest?
The simplest aspect of making a video tutorial on how to make a paper fortune teller, in my opinion, was the step-by-step instructions. It was easy to film as I had a clear strategy and was familiar with every fold and crease. The paper fortune teller was a simple object to show and explain because of its straightforward form and the repeated nature of the folding process. The tactile aspect of the work was also delightful, and it worked well for a visual medium such as a film. This approach was simple, which freed me up to concentrate on making the film interesting, clear, and simple for viewers to follow.
How would you approach capturing video differently next time?
My goal is to make the video’s viewpoint and clarity better. I would like to make it simpler for viewers to follow along, I would make sure that the camera is positioned to reflect their point of view. In order to make sure that every step is apparent, pay special attention to the lighting. I would also think about using close-ups to give a detailed look of complex steps. Finally, in order to properly lead the viewer through each step, I would include more spoken cues timed with the film. With this strategy, the viewers would be able to follow along with the video more easily and with greater engagement.
Leave a Reply
You must be logged in to post a comment.