What tools did you find useful in your explorations this week and how did you use them? Which ones were not useful?
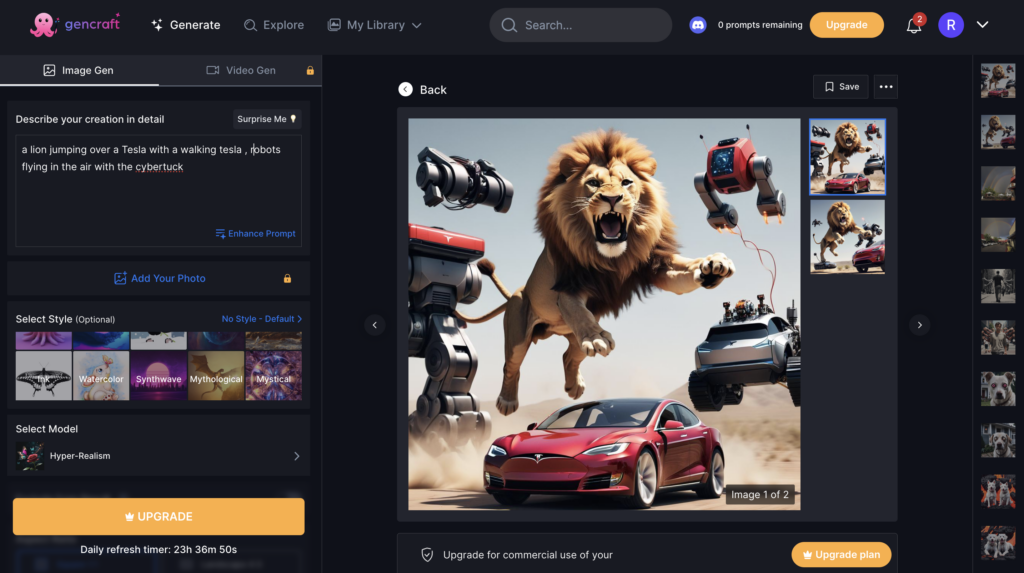
I found this website called Gencraft which is an AI-generated art created with a range of tools available . The main tool is the AI Art Image and Video Generator, which creates images from user-provided text. Gencraft offers a lot of varieties of genres, such as anime, photorealism, cartoons, and paintings, enabling users to further personalize their works.
I discovered that Gencraft is a strong platform for producing AI-generated art. The tool I experienced the most in the website was the AI Art Image Generator. All I had to do was entering a written description of the image I wanted to make. After that, the AI turned my writing into a distinctive work of art. My designs gained a customized touch when I was able to choose a style for my image. For example in the image below I typed two dogs in lava and the AI art image generated it for me.
“two dogs in lava ” prompt, Gencraft, version 2, OpenCLIP, 17 April. 2024, https://gencraft.com
My experience with AI tools, such as Gencraft, has shown me that although they can be quite strong, they are not perfect. I entered a text prompt asking for a picture of a man with five arms walking but instead the AI gernarated a picture of a guy with twelve arms walking. This showed me that AI is not always relable. It’s important to keep in mind that it could not always provide the expected outcomes. When using AI for activities that need a high degree of accuracy and precision, it’s always a good idea to double check the results.
“A man with five arms walking” prompt, Gencraft, version 2, OpenCLIP, 17 April. 2024, https://gencraft.com
Where do you think these tools will be in their evolution in 2-3 years’ time?
I think that AI tools will have greatly improved in the next two to three years. They will probably be more competent, adaptable, and efficient. AI will be easier to implement into many industries, and more people worldwide will have access to the technology. I also think that more advanced models that can comprehend and learn from intricate patterns in data will also be developed as AI advances. These models will not only increase forecast accuracy, but they will also improve decision making across a range of industries, including banking, healthcare, and transportation.
SECTIONS analysis
Students: Students interested in digital art, artificial intelligence, or graphic design are more likey to use the tools in Gencraft. This gives students the chance to play with artificial intelligence generated art and learn about the possibilities of AI in the arts.
Ease of use: User-friendliness is a important in tool design. Students who are unfamiliar with AI or digital art tools will find it easy. To create a picture, users only need to input a few phrases, after clicking the “Generate” button. Using the description as a guide, the AI will create a picture.
Costs: Free and paid options are both available under Gencraft’s freemium business model. Users may experiment with the tool and view the produced finished work in the free version.
Teaching & Media: Digital art and AI concepts can be taught using the tool. For presentations, projects, or digital portfolios, it can also generate unique images.
Interactivity: The tool allows for interactivity as users can provide different text prompts and see how the AI interprets and transforms these prompts into art.
Organizational issues: Gencraft’s design makes it simple to oversee students’ progress and integrate with developing new teaching styles
Networking: The tool can be used across various devices including Web, iOS, and Android. This makes it accessible and easy to use for a wide range of users.
Security & Privacy: Several security standards are met by Gencraft. Gencraft has put safeguards in place to secure user information and privacy.
Can you describe (step by step) an example of scaffolding in a learning experience that you’ve designed or experienced?
I’m a hip hop dancer and I had the chance to teach the knowledge of hip hop dancing to my friend . The introduction of the fundamentals of hip hop dance, including rhythm, body language, and footwork, was the first stage in the scaffolding process. I ran through each move with my friend so they could watch and learn the mechanics. Next, I gave my feedback and adjustments while we rehearsed these fundamental techniques together. We progressed to more difficult dancing routines after my companion felt confident with the fundamentals. I divided each routine into smaller chunks and taught and practiced each chunk before putting it all together.
What was your experience of trying out H5P? Which of the activities do you think you would make most use of in your teaching context and what would you use them to do? Which ones do you think require the most resources to create?
This was my first time trying out HP5 and I actually enjoyed the experience. I didn’t know what H5p was until I did this assignment but I found it very easy to use. After spending a lot of time learning about and experimenting with H5P, my understanding of and familiarity with this tool have really increased. I’ve learned about their features and uses. With this practical experience, I’ve gained the ability to design interesting and useful educational resources. As I did some research and played around with H5P I noticed that the H5P functionalities for Interactive Videos and Course Presentations seem quite helpful to me. I think H5P’s interactive video and course presentation is great to use for teaching context. With the extra advantage of interaction, these technologies allowed me to deliver course information in an entertaining way. I could include pop-up messages, fill-in-the-blank questions, and multiple choice questions in videos by using the Interactive Video tool. By doing this, I would make sure that instead of just having students watch a video, they are actively participating in the content by having the video paused for a multiple choice question. Slide displays could benefit from the addition of interactive elements like flash cards, pop-up quizzes, and interactive films. This would make learning more engaging and reinforce the content.
What storytelling techniques have you used instinctively and which ones require more work for you? Which techniques will you focus on moving forward?
It Depends on the background and the type of tale, using storytelling skills might come naturally or need more conscious effort. Certain strategies are instinctual to apply, such drawing the audience into the narrative, building tension, and sharing a personal tale. Since these methods are essential to human communication and experience sharing, they frequently come easily to people. Still, other methods could take more effort. For example, it requires practice to become proficient in storytelling and to understand how to turn experiences into a tale. Developing skills over time, such as by studying seasoned communicators, putting oneself in their shoes, and utilizing tales in daily situations, are common ways to become an expert storyteller.In the future, the emphasis could be on methods that advance a narrative. These include employing visual design, metaphors, and analogies, combining emotion, and providing engaging data with a clear structure. Pages with a pyramid structure are also recommended. Furthermore, it might be helpful to comprehend and apply many story arcs, such as the Four C’s (Context, Conflict, Climax, Closure). These methods can raise interest and build anticipation, which improves tale recall and comprehension.
What learning experience does a branched narrative like Twine provide for learners? Where else do you come across branched narratives?
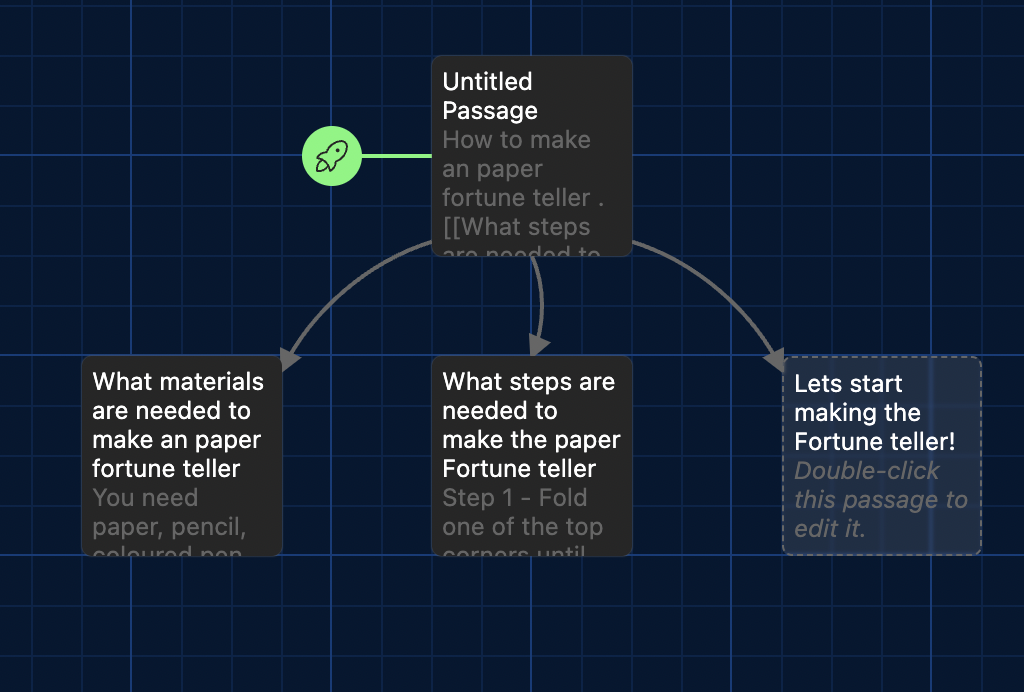
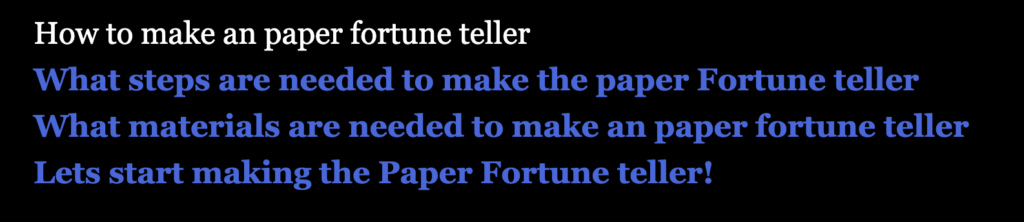
An engaging and dynamic learning environment is offered by a branching story such as Twine. Making decisions in the branching story gives students a sense of agency over their learning process and boosts their engagement with the course material. With several choices that have different consequences, this format forces students to exercise their critical thinking and decision-making abilities. They must consider the alternatives that are offered to them in order to analyse the decisions and try to determine which would result in the best conclusion. Additionally, it gives kids a playful setting in which they may practise growing from errors and trying different approaches when something doesn’t work the first time.Twine is not the only author of branched tales. They are available in a variety of formats, such as “Choose Your Own Adventure” novels, in which the reader’s choices take them to other sections of the book. Video games with a plot that changes depending on player choices are another well-known example. Branching scenarios are a common tool used by eLearning course designers to build dynamic and captivating learning environments.
Storyboard
Narration: Hello, this is how to make a paper fortune teller
Narration: You need paper, scissors, coloured pens, and pencils
Narration:Fold one of the top corners until the top edge of the paper is exactly in line with the side opposite of the corner that you started at. Cut a straight line parallel with the bottom of the page along the line where the folded portion of paper and the small rectangle meet.
Narration:Fold the top right corner into the bottom left corner to create a triangle shape. Crease the edge then unfold it back out. Repeat with the other side. You should have an “X” shape with the folds.
Narration: Bring each corner to the center of the paper and crease the fold. Now you should have a mini square with all corners meeting in the middle. Flip the smaller square piece of paper over.
Narration: Fold each corner to the center once more. You will again have a square shape. The numbers should be facing towards you!
Narration: Fold the fortune teller in half so the numbers face in and the square flaps are on the outside. Slide your thumbs and pointer fingers under the squares to operate the fortune teller.
Narration: Here you go you have built a paper fortune teller
Script
Introduction
Hello everyone today we will be making a paper fortune teller. These are the stuff we need first is paper then scissors then coloured pens and a pencil
The steps
Step 1 : Fold the top corner into the bottom left corner once you have created a triangle I will be cutting off the unnecessary part. once the unnecessary part is cut off we are going to repeat on the other side. Now you should have a triangle shape.
Step 2: Fold the paper in half then unfold again to the original square . Rotate it 90 degrees and fold it once more. When you open it up there should be 4 intersecting lines on the paper.
Step 3: Bring each corner to the centre and crease the fold. You should now have a mini square with the corner meeting in the middle. Flip the smaller piece of paper over and fold each corner to the centre once more.
Step 4: Writing the numbers outside the smaller folded paper.
Step 5: Fold the fortune teller in half so the numbers face in and the square flats are on the outside. Once you have created a triangle you want to unfold it.
Step 6: We start colouring in outside of the folds. The last part is sliding your thumb and pointer finger under the square to operate the fortune teller .This might be challenging since the paper is stiff but once you got it its going to be easier
Conclusion
This is how you make a paper fortune teller. Thank You!
Assignment Reflection
What is the learning purpose of your video?
The purpose of the video is to guide audiences on how to make a paper fortune teller.This video includes instructions in detail, making it easy for everyone to get started.
Why is video a good medium for this learning purpose?
The visual and interactive aspects of creating a video instruction for making a paper fortune teller make it a great learning tool. When learning anything hands-on, like making a paper fortune teller, watching videos of the procedure in action may be quite helpful. To make sure students grasp every step, they may fast-forward, rewind, or rewatch sections of the movie. Videos may also emphasize fine features that could be overlooked in textual instructions by using close-ups and various camera angles. Verbal explanations that go along with the visual example can also be helpful for auditory learners. Because it can accommodate different learning methods, a video instruction is a useful teaching tool for creating paper fortune tellers.
Which of the principles we’ve covered this term (e.g., Mayer/Universal Design for Learning/Cognitive Load Theory) did you incorporate into your design and why?
Mayer’s Multimedia Learning Theory: Learning occurs more effectively when words and images are combined. The steps are demonstrated visually in the video, and they are also explained verbally to improve comprehension.
Universal Design For Learning (UDL): Throughout my video, I’ve presented material in a variety of ways to accommodate varying learning styles. discussing it, much like the visual portion. It is also interactive because it allows viewers to pause and replay the spoken portion.
Cognitive Load Theory: limiting the quantity of material offered to prevent the student from being overwhelmed. The video reduces the inherent cognitive strain by segmenting the procedure into small phases and displaying each one separately.
What was challenging about capturing your own video?
Capturing my own video was a challenging endeavor. One of the first obstacles I encountered was ensuring adequate lighting and sound quality. Without professional equipment, it was difficult to achieve a clear and well-lit video, and the audio was not always as crisp as I would have liked. Framing the shot was another hurdle. It was tricky to position the camera in a way that captured all the necessary details, especially when demonstrating intricate tasks. I found myself constantly adjusting the camera angle for the best view. Delivering clear and concise instructions while performing the task was also a challenge. I had to be mindful of my wording and pace, which often required multiple takes. Lastly, I faced technical issues such as running out of storage space and battery life, which interrupted the recording process. Despite these challenges, the experience was a valuable learning opportunity.
What did you find easiest?
The simplest aspect of making a video tutorial on how to make a paper fortune teller, in my opinion, was the step-by-step instructions. It was easy to film as I had a clear strategy and was familiar with every fold and crease. The paper fortune teller was a simple object to show and explain because of its straightforward form and the repeated nature of the folding process. The tactile aspect of the work was also delightful, and it worked well for a visual medium such as a film. This approach was simple, which freed me up to concentrate on making the film interesting, clear, and simple for viewers to follow.
How would you approach capturing video differently next time?
My goal is to make the video’s viewpoint and clarity better. I would like to make it simpler for viewers to follow along, I would make sure that the camera is positioned to reflect their point of view. In order to make sure that every step is apparent, pay special attention to the lighting. I would also think about using close-ups to give a detailed look of complex steps. Finally, in order to properly lead the viewer through each step, I would include more spoken cues timed with the film. With this strategy, the viewers would be able to follow along with the video more easily and with greater engagement.
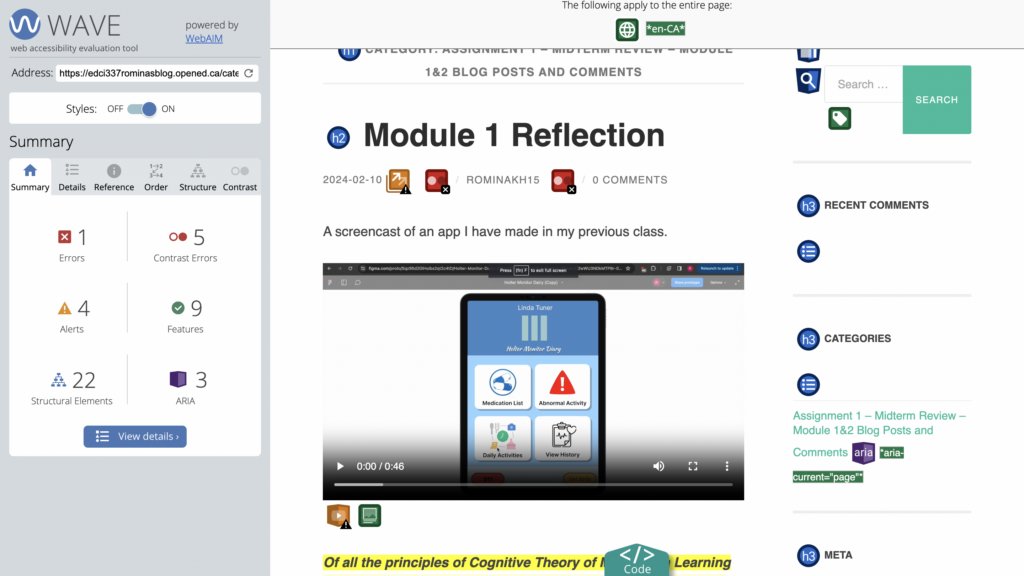
What did you find when you ran the WAVE accessibility report on your blog post(s)? What did you expect and what was surprising? Is there anything you will do differently going forward?
I found more contrast mistakes than I had anticipated when I conducted my investigation. It surprised me how many contrast problems there were when I performed the WAVE accessibility assessment on my blog article. I’m going to focus more on colour contrast in the future and make sure that all users can access it better.
What role do you think media and multimedia can play in a learning environment designed with UDL guidelines in mind? Which of the promising practices for text, images and video are in alignment with these guidelines?
In a learning environment that is created with the Universal Design for Learning (UDL) standards in mind, media and multimedia are essential components. They provide you the freedom to convey knowledge in a variety of ways to meet the different demands of your students. Using a range of multimedia, such as text, music, photos, and videos, might be one way to do this. Using touch equivalents for important visuals that convey concepts and include explanations for all pictures, graphics, videos, and animations are promising practices for text, images, and video that comply with UDL criteria. Furthermore in accordance with these recommendations is providing options for adjusting the way information is shown, including text, image, graph, table, and other visual content sizes, as well as the contrast between the backdrop and text or picture. By ensuring that every student can comprehend and interact with the material, these procedures foster an inclusive and productive learning environment.
What does inclusive design mean to you?
The goal of designing for inclusion is to create environments, products, and services that are as user and understanding friendly as possible. This comprises those who are frequently left out or ostracized due to their circumstances, identity, or aptitude. In order to avoid discrimination and exclusion in design, inclusive design values diversity among people.
A screencast of an app I have made in my previous class.
Of all the principles of Cognitive Theory of Multimedia Learning we looked at in this module, which seem most intuitive to you? Which ones surprised you?
Segmenting is considered intuitive because it makes learning easier by “chunking,” which is a natural approach in instructional design. Learners may progressively comprehend the material at their own speed by decomposing complicated concepts or information into smaller, more accessible steps. This approach lessens cognitive strain, which facilitates processing and memory of the information. It also allows students to take charge of their education by letting them take their time and fully understand each lesson before going on to the next.By making difficult knowledge more approachable and controllable, segmenting improves the learning process. It is surprising how effective the Personalization Principle can be in enhancing learning. I find it fascinating that using first person or second person language, such as contractions, can improve comprehension so significantly. According to this principle, our brains respond positively to friendly, informal tones, as if we were chatting one on one with the speaker. By using polite phrases, the learning experience feels more personalized and engaging. It can be challenging to achieve this naturalness, especially when facing a camera. What makes the Personalization Principle so fascinating is the surprising complexity behind what seems like a simple conversation.
Who did you imagine as the audience for this screencast? How did that impact your design choices?
This screencast was intended for the students and professor in my class. I wanted to create a screencast that was informative, engaging, and easy to understand for them. To achieve this, I used some of the tips from Module 1: How do We Learn?In my presentation, I used less text and more graphics to summarise the information and make it easier to understand. Besides using text size, colour, and icons to emphasise the key points, I also used icons to draw the audience’s attention. In my screencast, I emphasised the main idea and kept it short.
Photo by Flickr user jfchenier under CC license: BY-NC 2.0
Before proceeding with this first blog post, we expect you to consider your privacy preferences carefully and that you have considered the following options:
Do you want to be online vs. offline?
Do you want to use your name (or part thereof) vs. a pseudonym (e.g., West Coast Teacher)?
Do you want to have your blog public vs. private? (Note, you can set individual blog posts private or password protected or have an entire blog set to private)
Have you considered whether you are posting within or outside of Canada? This blog on opened.ca is hosted within Canada. That said, any public blog posts can have its content aggregated/curated onto social networks outside of Canada.
First tasks you might explore with your new blog:
Go into its admin panel found by adding /wp-admin at the end of your blog’s URL
Add new category or tags to organize your blog posts – found under “Posts” (but do not remove the pre-existing categories or sub-categories). If you would like to add more course categories, please do so (e.g., add EDCI 306A with no space for Music Ed, etc.)
See if your blog posts are appearing on the course website (you must have the course categories assigned to a post first and have provided your instructor with your blog URL)
Add pages
Embed images or set featured images and embed video in blog posts and pages (can be your own media or that found on the internet, but consider free or creative commons licensed works)
Under Appearance,
Select your preferred website theme and customize to your preferences (New title, etc.)
Customize menus & navigation
Use widgets to customize blog content and features
Delete this starter post (or switch it to draft status if you want to keep for reference)
Do consider creating categories for each course that you take should you wish to document your learning (or from professional learning activities outside of formal courses). Keep note, however, that you may wish to use the course topic as the category as opposed to the course number as those outside of your program would not be familiar with the number (e.g., we use “Multimedia Learning” instead of “edci337).
Lastly, as always, be aware of the FIPPA as it relates to privacy and share only those names/images that you have consent to use or are otherwise public figures. When in doubt, ask us.


Recent Comments